How to Add Captions to Wistia Videos
Here’s how to add captions to Wistia videos broken down step by step. Using captions can resolve usability issues for viewers with hearing problems.
You made the jump to Wistia and are ready to start building your brand through professional videos that attract viewers. To boost viewer engagement and reach a broader audience, you’ll need to make the videos highly accessible. That means every viewer needs to understand the audio in your video file.
What if your viewers are hard of hearing? Using captions can resolve usability issues for viewers with hearing problems. Even if they aren’t hard of hearing, captions are a powerful accessibility tool so that even those viewers who want to watch your video (but are unable to watch it with the volume on – ex: being out in public) can.
It also helps expand brand reach by making your videos relevant to a larger viewer base.
After creating your video, thoroughly edit it to make sure the music and audio are on point. Next, you’ll want to create your SRT captioning file, upload the video to Wistia, and embed your caption file. The steps sound easy enough, but if you’re new to Wistia or haven’t uploaded a video recently, you might need a bit of direction. Here’s how to add captions to Wistia videos broken down step by step.
Choosing a Captioning Service
Choose a captioning service that provides accurate, high-quality captions that meet Americans with Disabilities Act (ADA) regulations for video. Submit your video to your captioning service. Once the file is ready. edit as needed and create the SRT file. Save your finished caption to your videos parent file for easy access.
For the purposes of learning how to upload captions to Wistia, we’ll use a RevTest.srt file. We can caption your video if you’d like, simply go to our captions page and upload your video. You’ll receive your captioning transcript within 24-hours for only $1.99 per video audio minute.
Uploading Your Video to Wistia
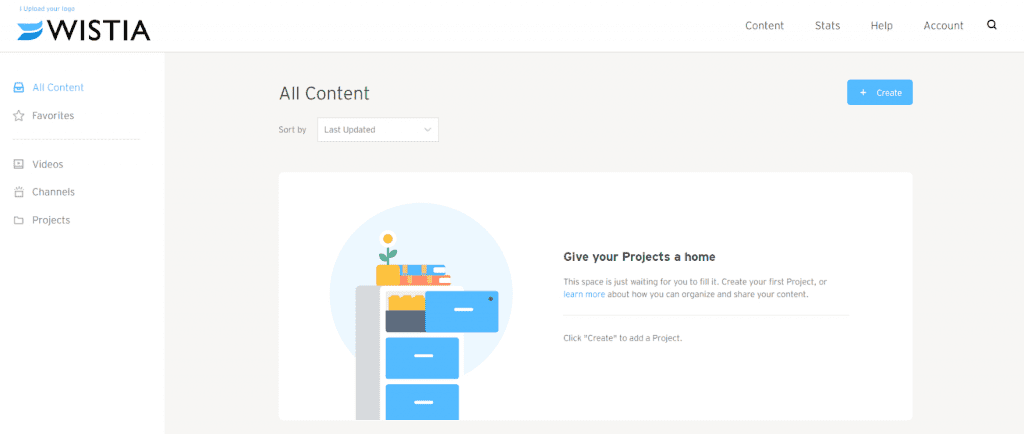
First you’ll need to log into your Wistia account. You can sign in using Google, Microsoft, or use your email and password for the site. Next you’ll need to upload your video to Wistia using the following instructions.
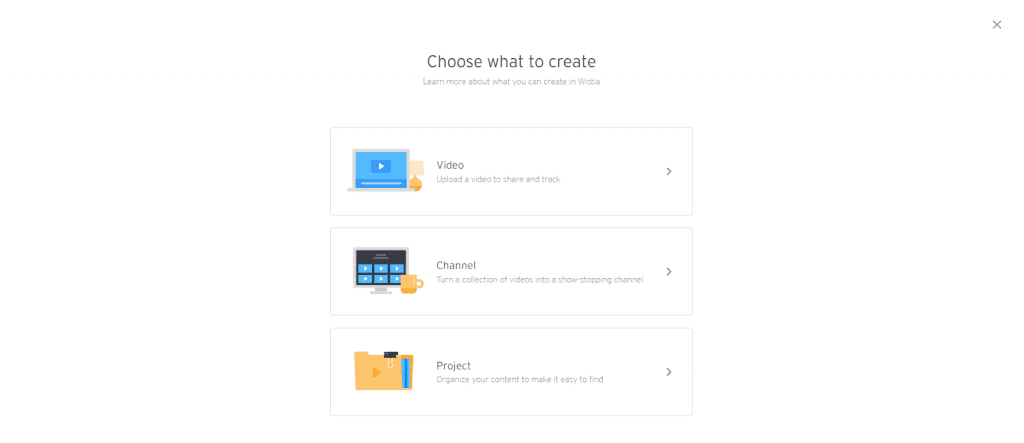
1. Select Video
The following window will appear asking you what you would like to create, to upload your video select Video.
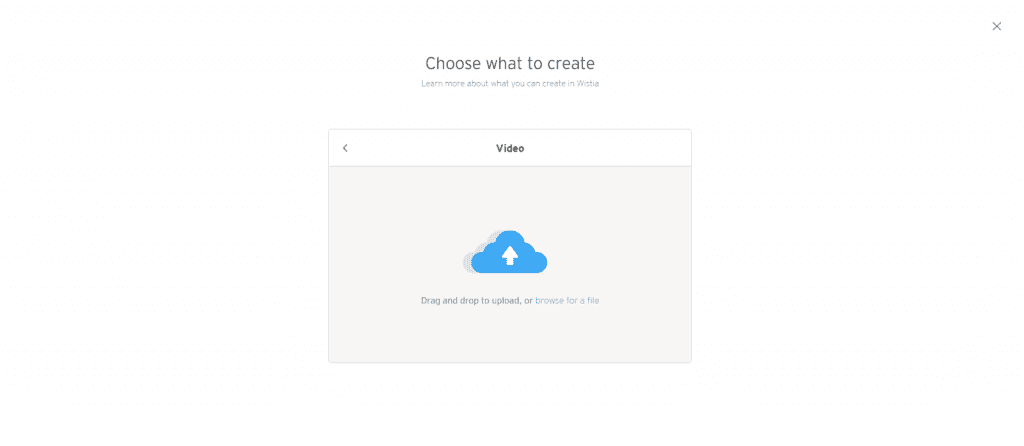
2. Upload Your File
Drag and drop your video file into the next window. You can also choose browse for a file to select it from its parent file on your device.
3. Choose Your Parent Project
The next window will ask you to choose which project to add your video to. Choose your parent project from the drop-down menu, then click on the blue Upload button.
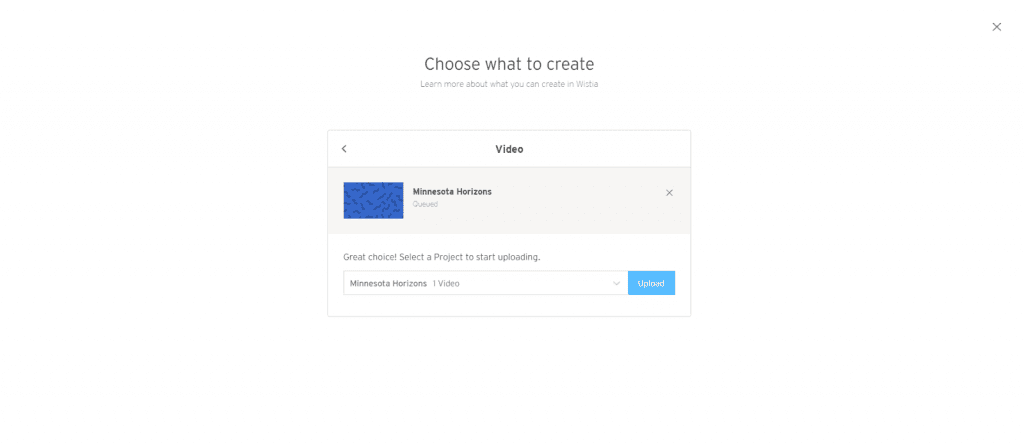
4. Review Your Video
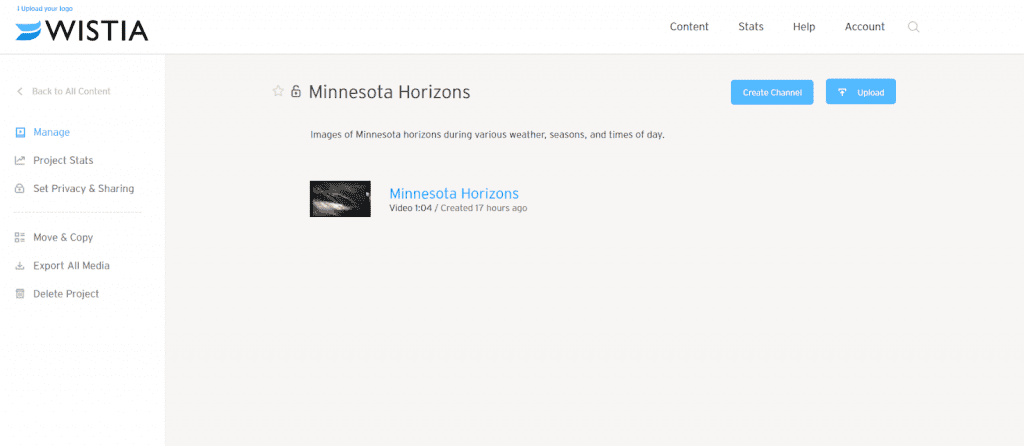
You’ll see your video underneath the specified project. It’s recommended to do a final run-through of your video file, to make sure it’s loaded properly. Once you upload your video to Wistia and complete any last-minute edits, you can embed your captions file.
How to Add Captions to Your Wistia Video
Wistia uses SRT files for captions and subtitles. To add captions to your video you’ll first need to click on the blue video title, the example here is Minnesota Horizons. On the next page you’ll see a new menu on the left. Use the following instructions to add your captions.
1. Toggle Captions On
On the menu, locate captions and toggle the On/Off switch to On. You’ll notice an example caption appears at the bottom of your video, and new menu appears on the left.
2. Click on Upload
Click on the blue upload link directly under the toggle switch.
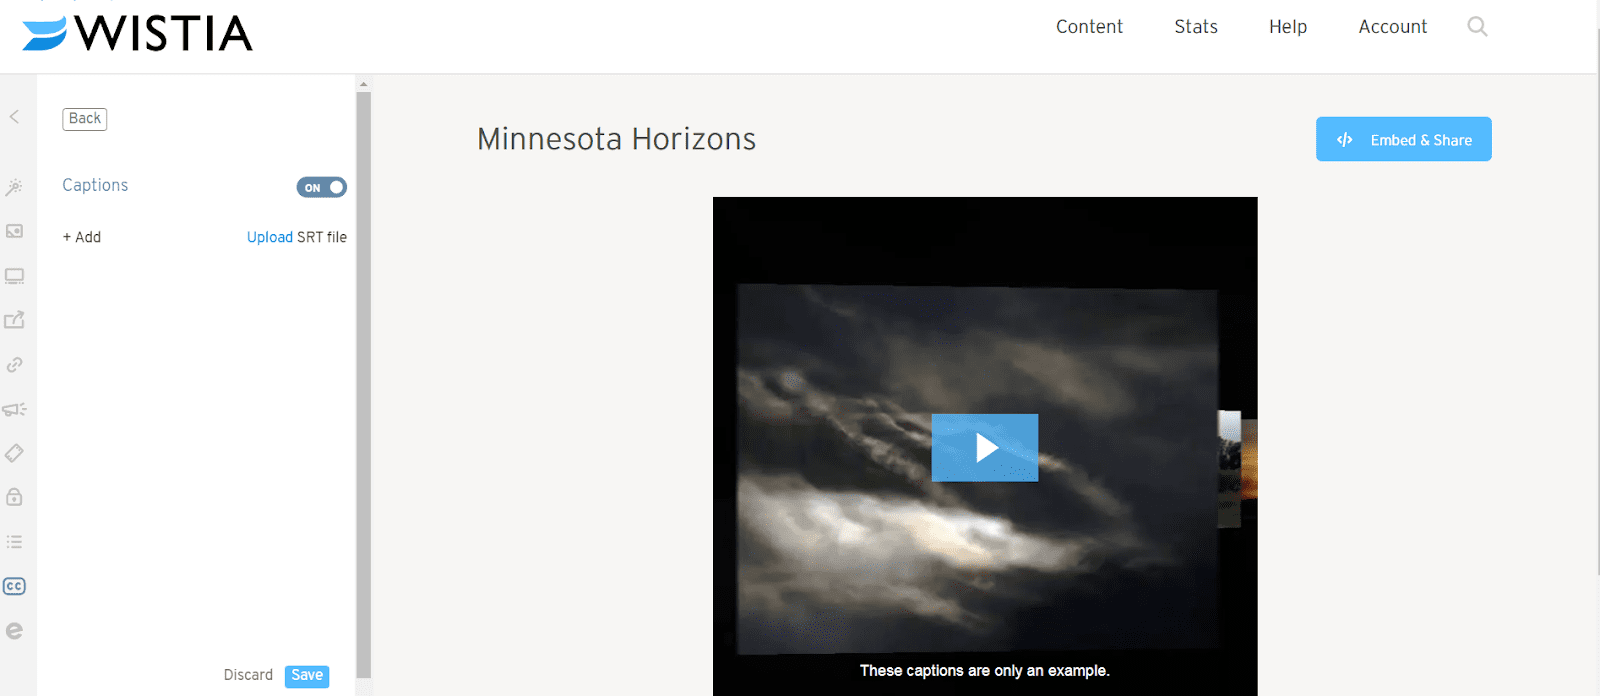
3. Open Your SRT File
Locate the SRT file on your device, then click the Open button.
4. Upload the SRT File
Select your caption default settings and then click on the Save button. You should notice that the SRT file captions have replaced the example captions. Click on the Embed & Share button to finish.
5. Return to Your Projects Page
Here is where you’ll see the finished video.

The captions improve viewer experience, help your brand reach a more diverse audience, and increase your rank in search engines. You can also add captions and subtitles to video apps for your business’s social media sites, including YouTube and Instagram.
Best Practices for Captioning Wistia Videos
Here are a few more ways you can make sure you post a quality captioned video that furthers your brand.
Edit Your Video Fully Before Submitting it for Captioning
Make sure to edit your video completely and add music before sending it to a captioning service. You’ll receive a more accurate video transcript if the video is as complete as possible before sending the file for captioning. Never send in an incomplete or in process video, you’ll only end up paying your captioning service to redo the transcript.
How to Know Whether to Use Captions or Subtitles on Video Files
It’s important to know when to use captions vs. subtitles. Captions dub the videos original video audio into text, to aid the hard of hearing. Subtitles are foreign language transcripts of video audio, that can expand the reach of your brand to other geographic locations.
To add subtitles to videos in Wistia, you’ll need to specify to the captioning service that you need your video audio converted to a specific language. You can then follow the same steps for uploading captions, including creating an SRT file from your finished video transcript.
Choose A Trustworthy and Knowledgeable Captioning Service
The best way to make sure you get high-quality captions is to use professional captioning services familiar with ADA regulations. That way you’ll know your Wistia videos meet TV quality standards and legal requirements for online captioning.
We partner with organizations across industries to offer quality captions and subtitles that work on multiple video platforms. You created captivating brand videos, now boost viewer engagement and broaden your audience with clear captions.
Subscribe to The Rev Blog
Sign up to get Rev content delivered straight to your inbox.


